Bubble is powerful no-code platform for creating digital products and makes it possible to create an application that powers chat along with a fully custom marketplace. This integration allows your team to use Marketbase as a dashboard for moderating, reviewing, and flagging these chat messages that are sent through Bubble – all without any code.
Go to your Marketbase dashboard and select your workspace that you would like to integrate Bubble with. If you already setup an API key on Marketbase, you can skip to Step 2.
Open 'Settings' page and scroll down to the 'API keys' section.
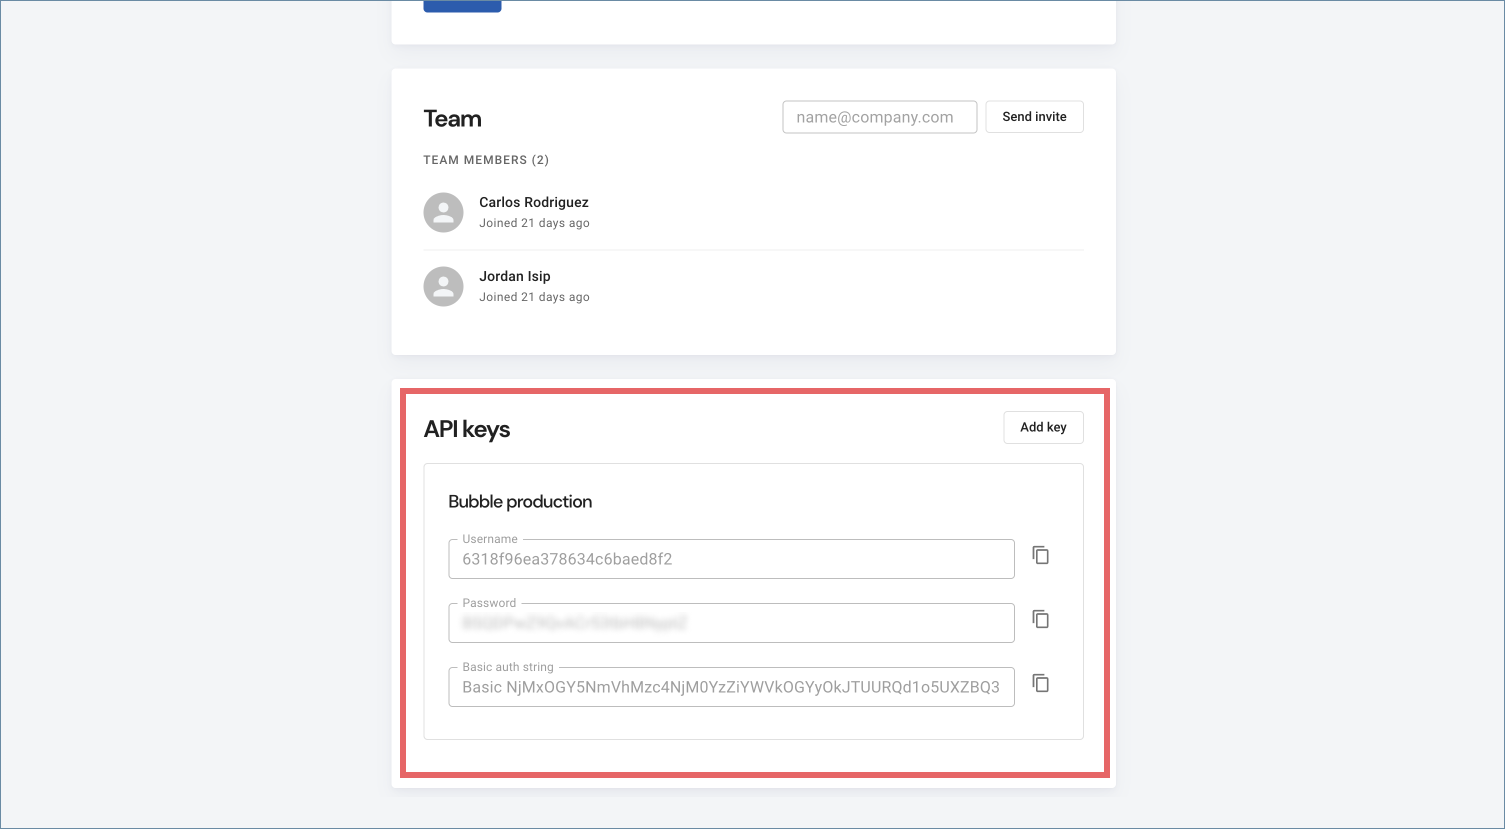
Click 'Add key' and follow the directions to add a new key.
Once you have a key created, make note of the username and password for your API key as you'll need it in the following steps.
Before we configure the connection between Bubble and Marketbase, we'll first want to ensure that your Bubble application has the data type for your chat messages. If you already have a chat message data type, you can skip to step 3.
Go to your Bubble dashboard.
Click on your app to open in the Bubble editor.
Click on the 'Data' tab.
In your 'Data types' tab, add a 'Conversation_message' data type which will store your chat messages. This should look something like this but may vary depending on the needs of your platform:

With your data setup, the next step is to add the built in Bubble Plugin called 'API Connector'. If you already have the 'API Connector' plugin installed, you can skip to the next step.
Click on the 'Plugins' tab within your Bubble application's editor.
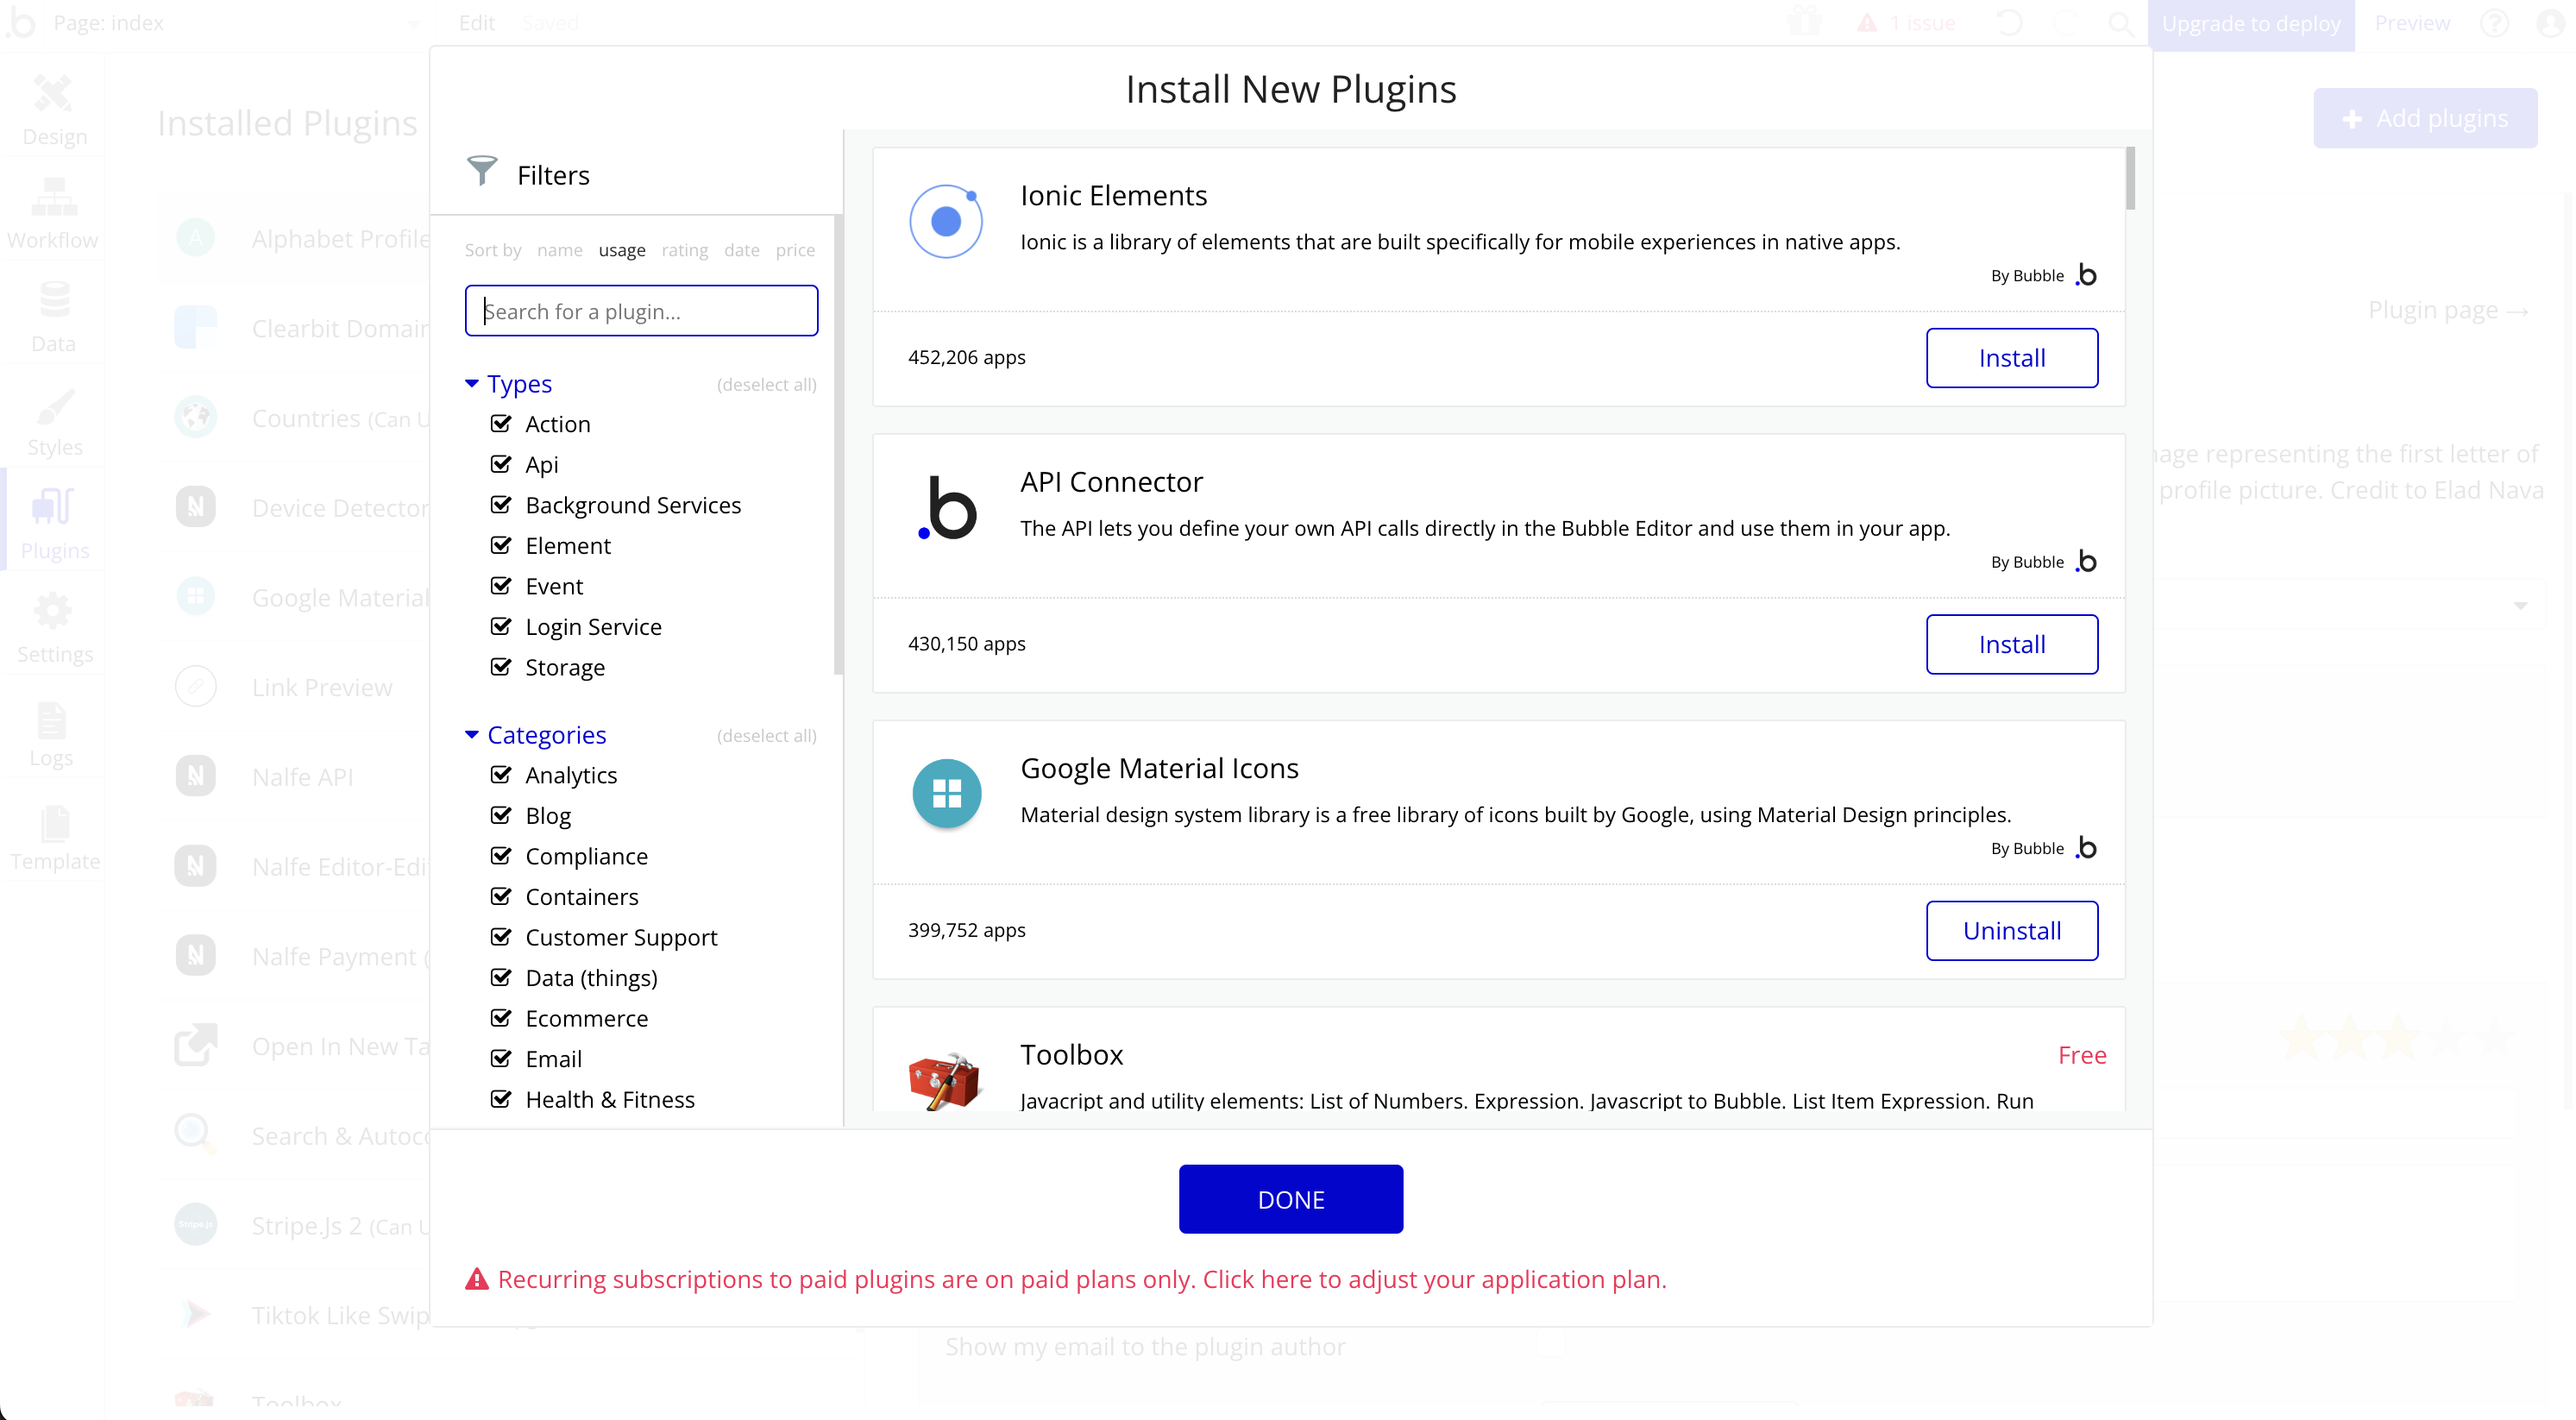
Click 'Add plugins'.
Select all and/or search to find 'API Connector' plugin by Bubble.
Click 'Install' within the API Connector section.
The 'API Connector' plugin should now be available from your list of plugins on your 'Plugins' tab:
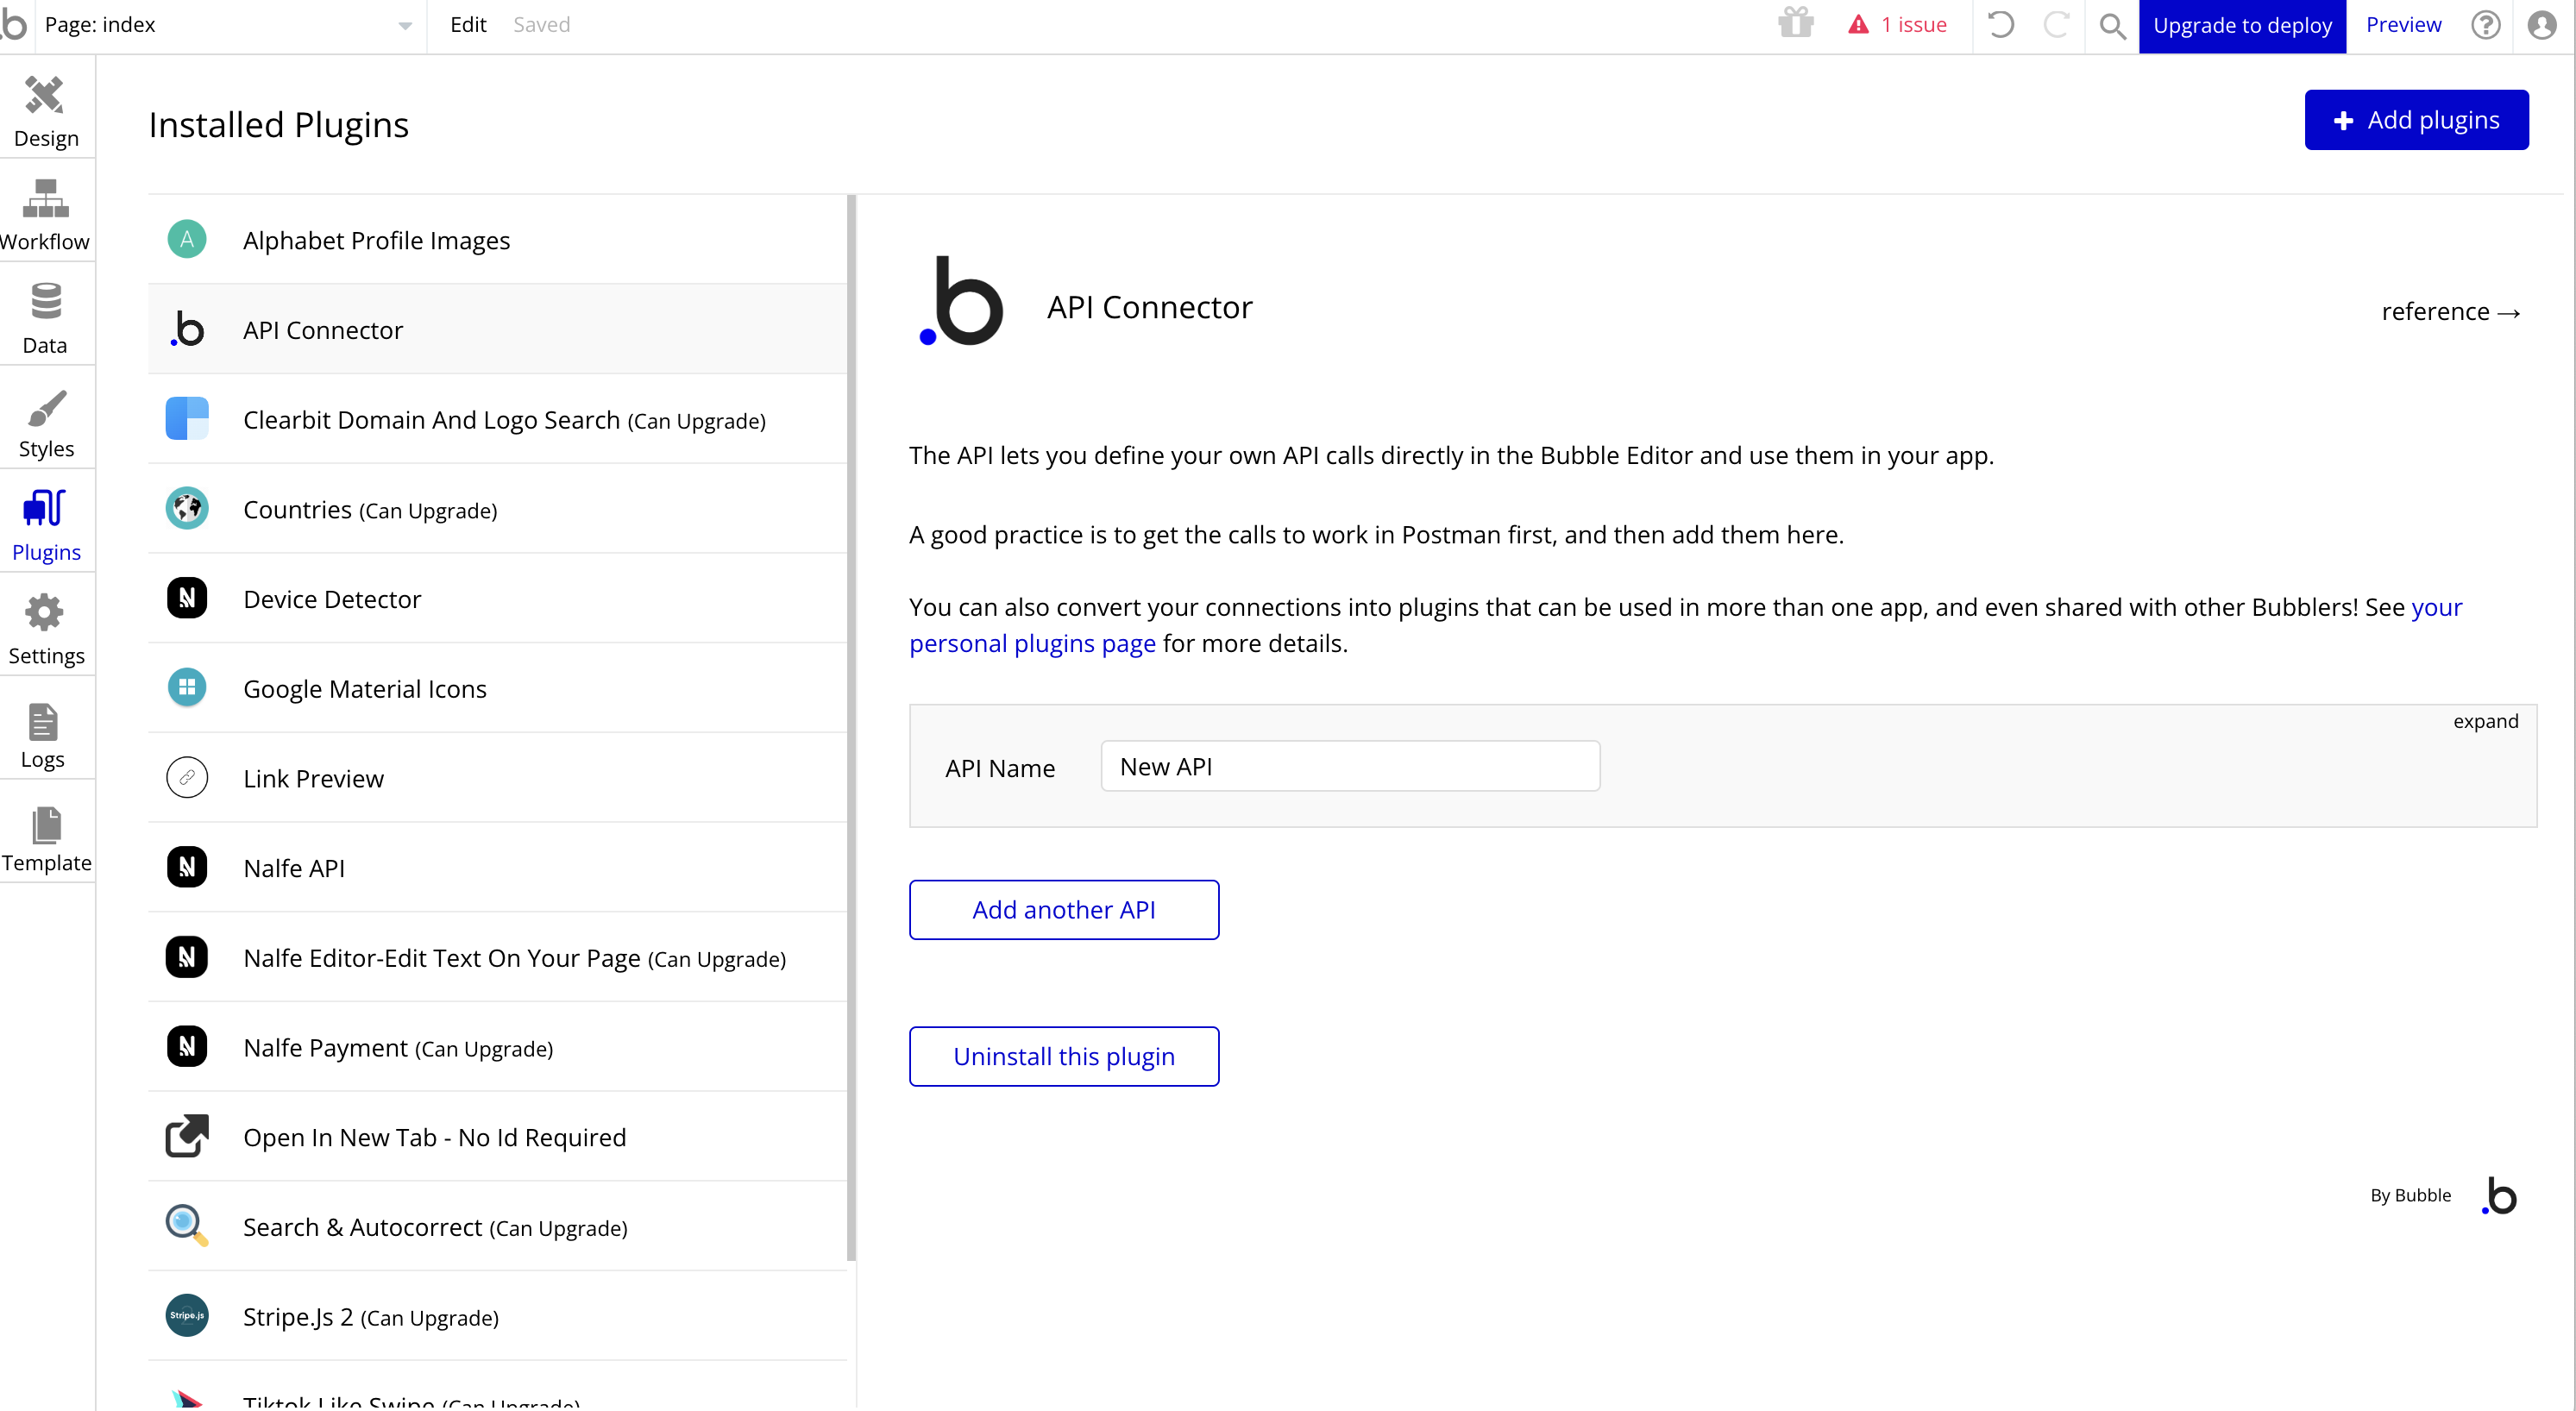
Now that you have the 'API Connector' installed, let's configure it to point to the Marketbase API.
From the Plugins tab with 'API Connector' plugin selected, click on 'expand' next within the 'API Name' section to edit your new API connector.
Input the following:
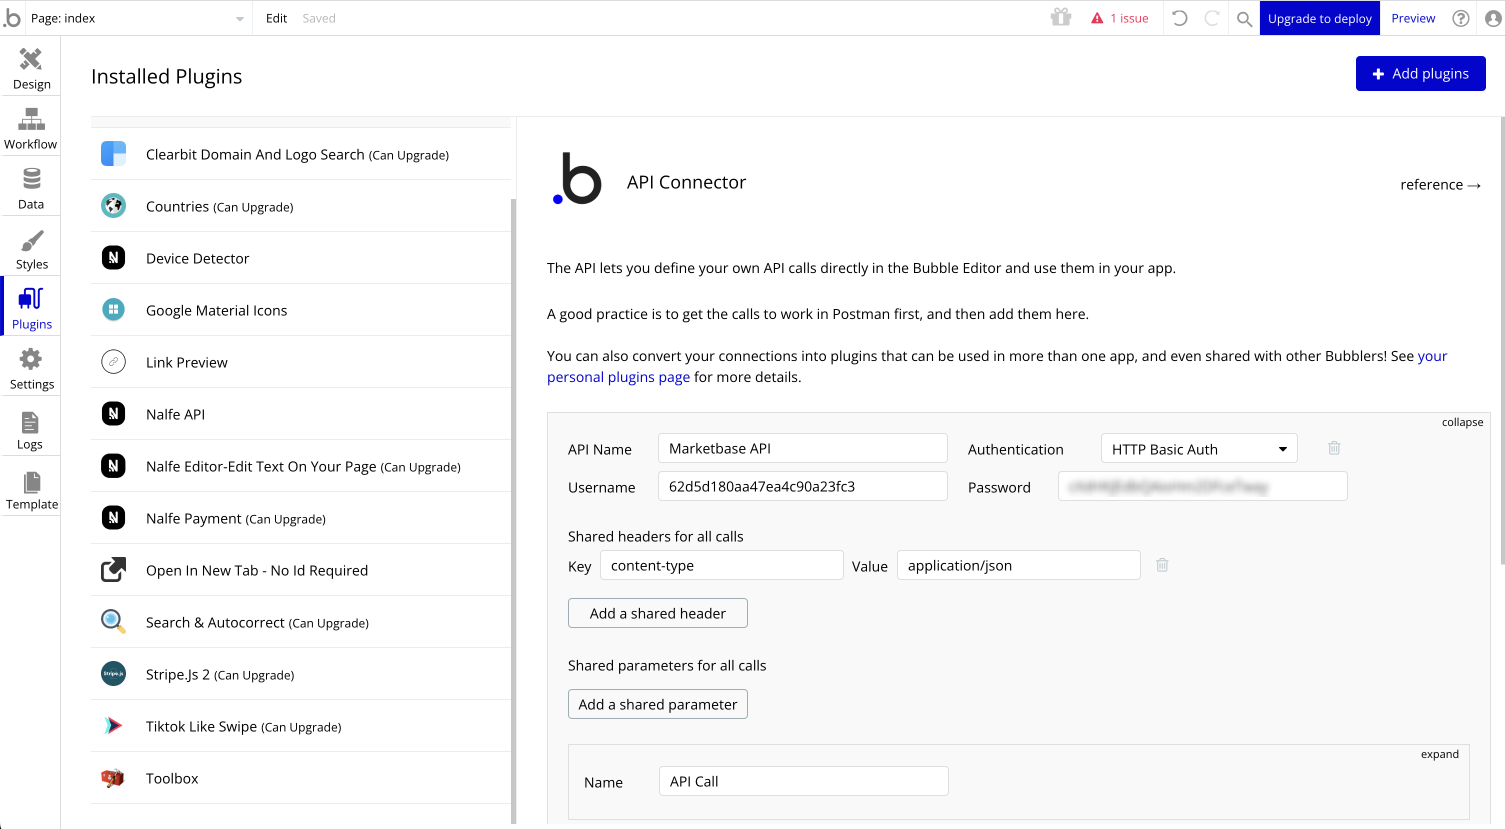
Click 'expand' next to API call.
Input the following:
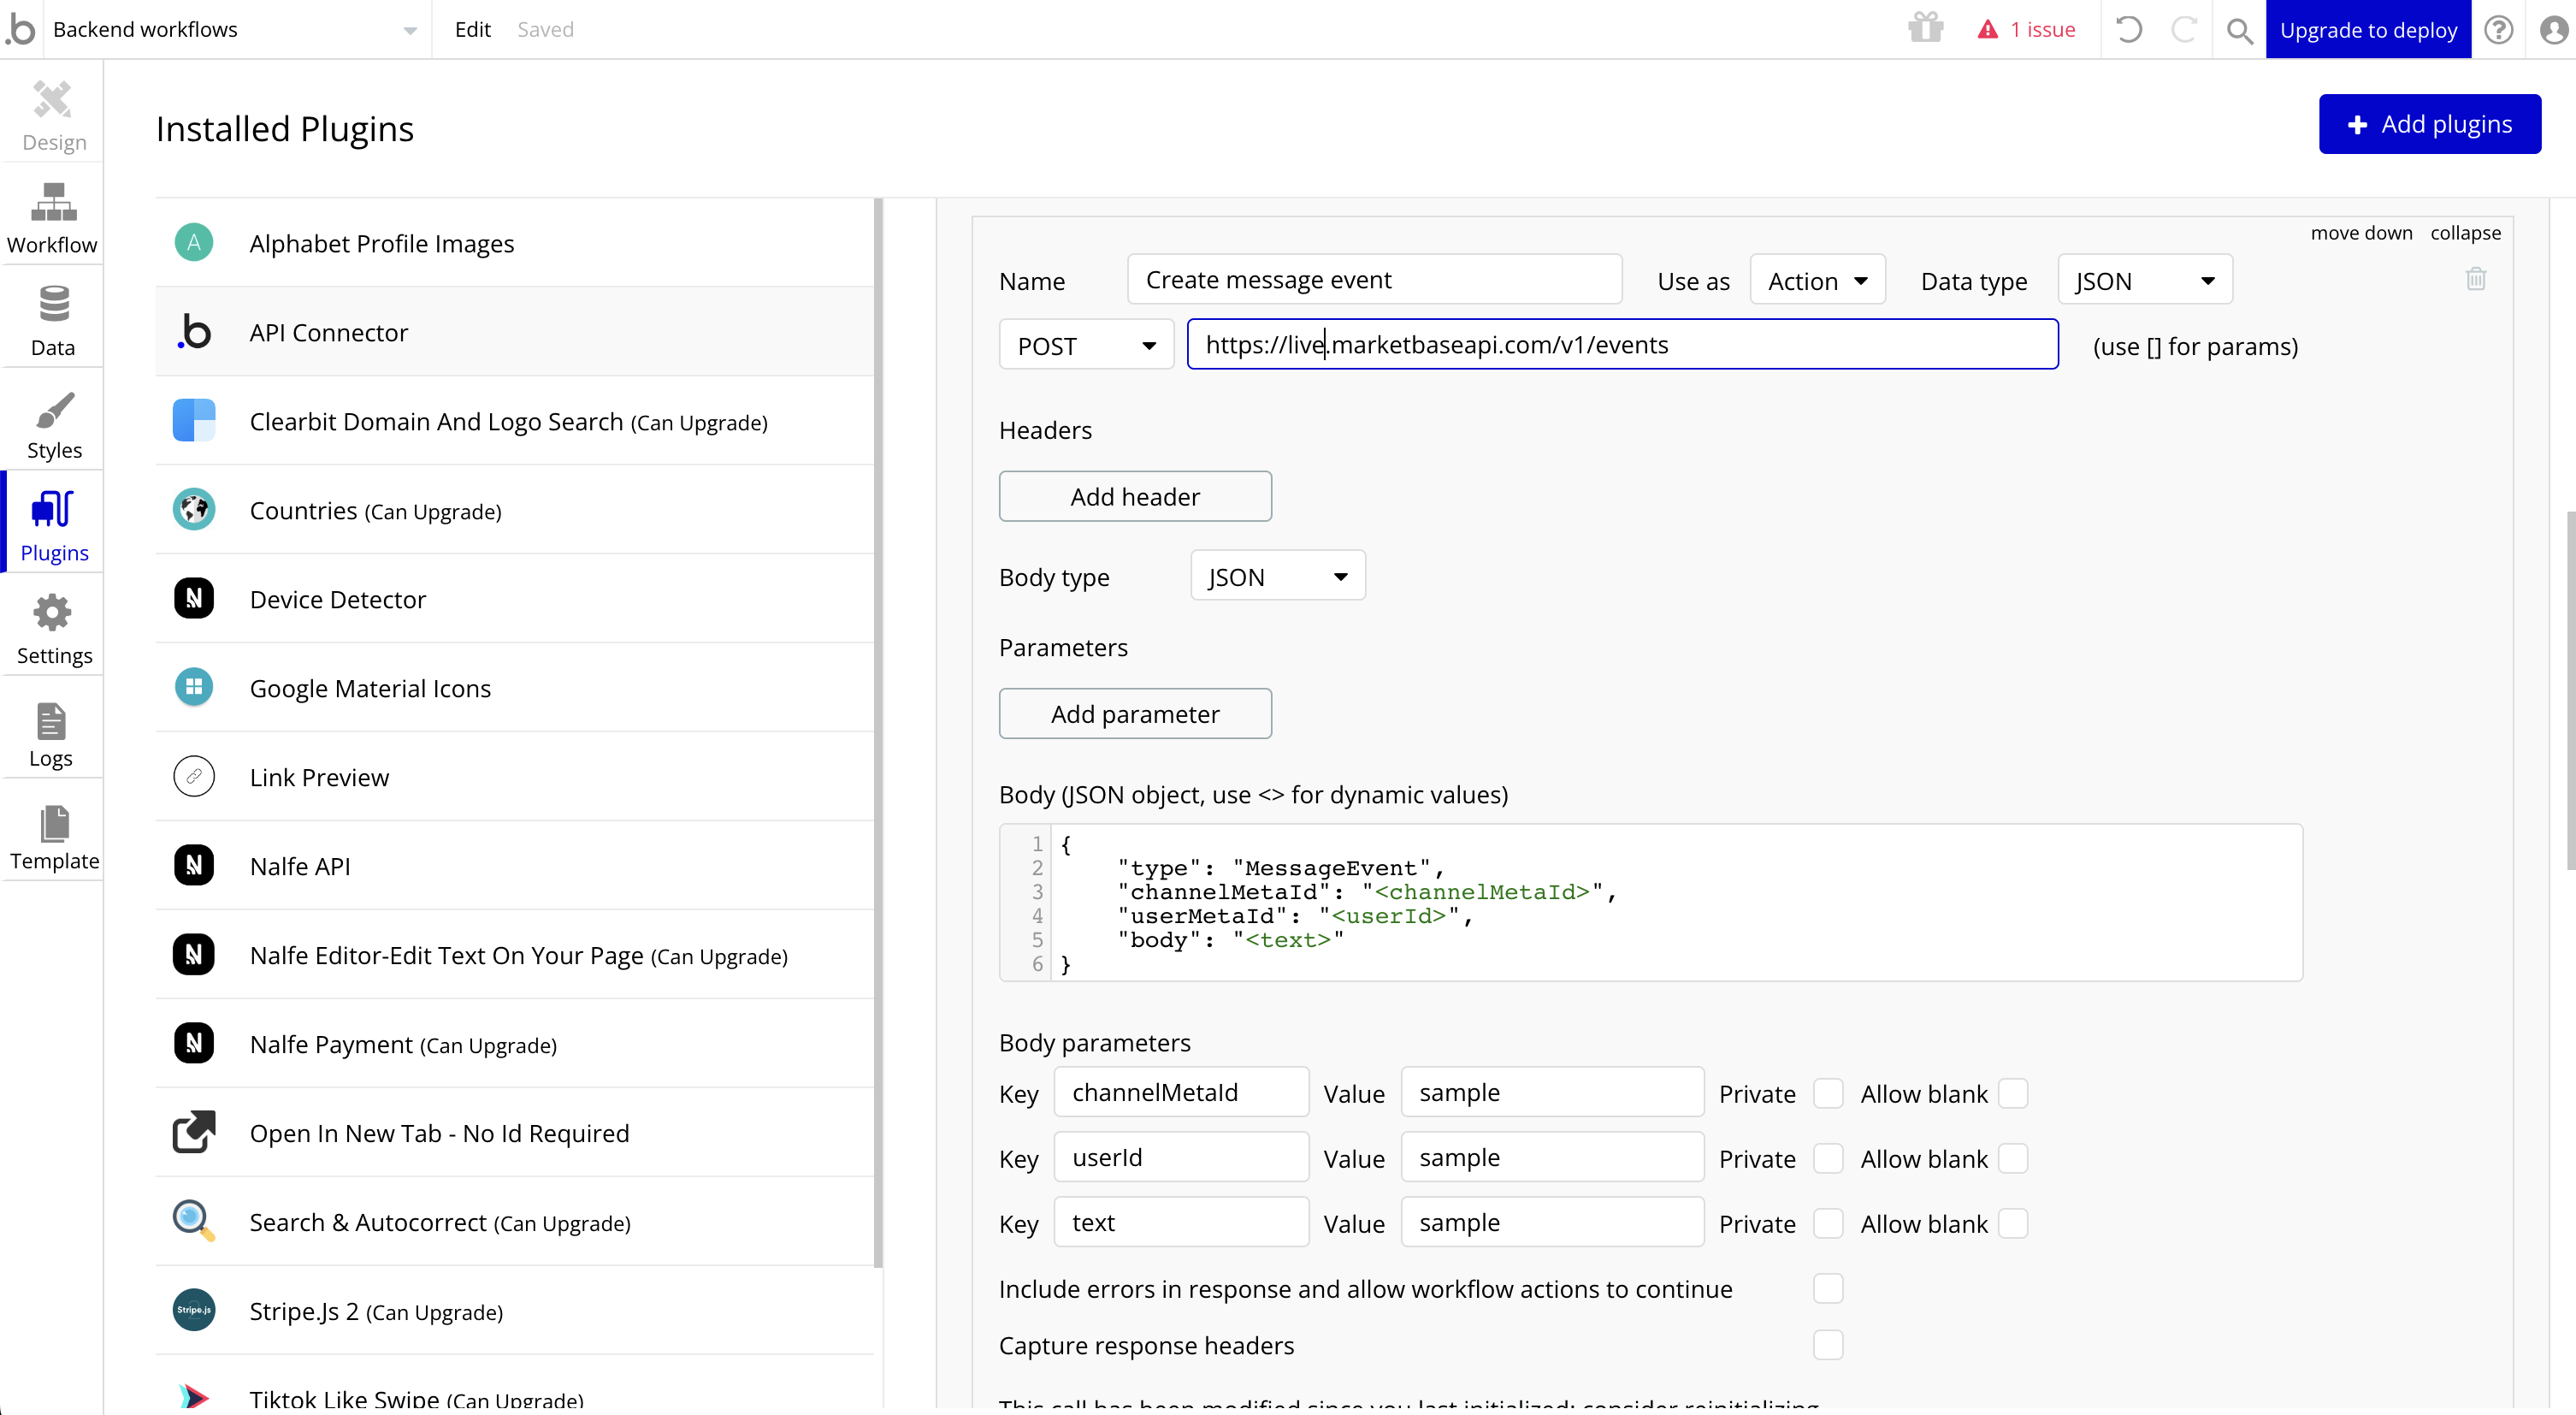
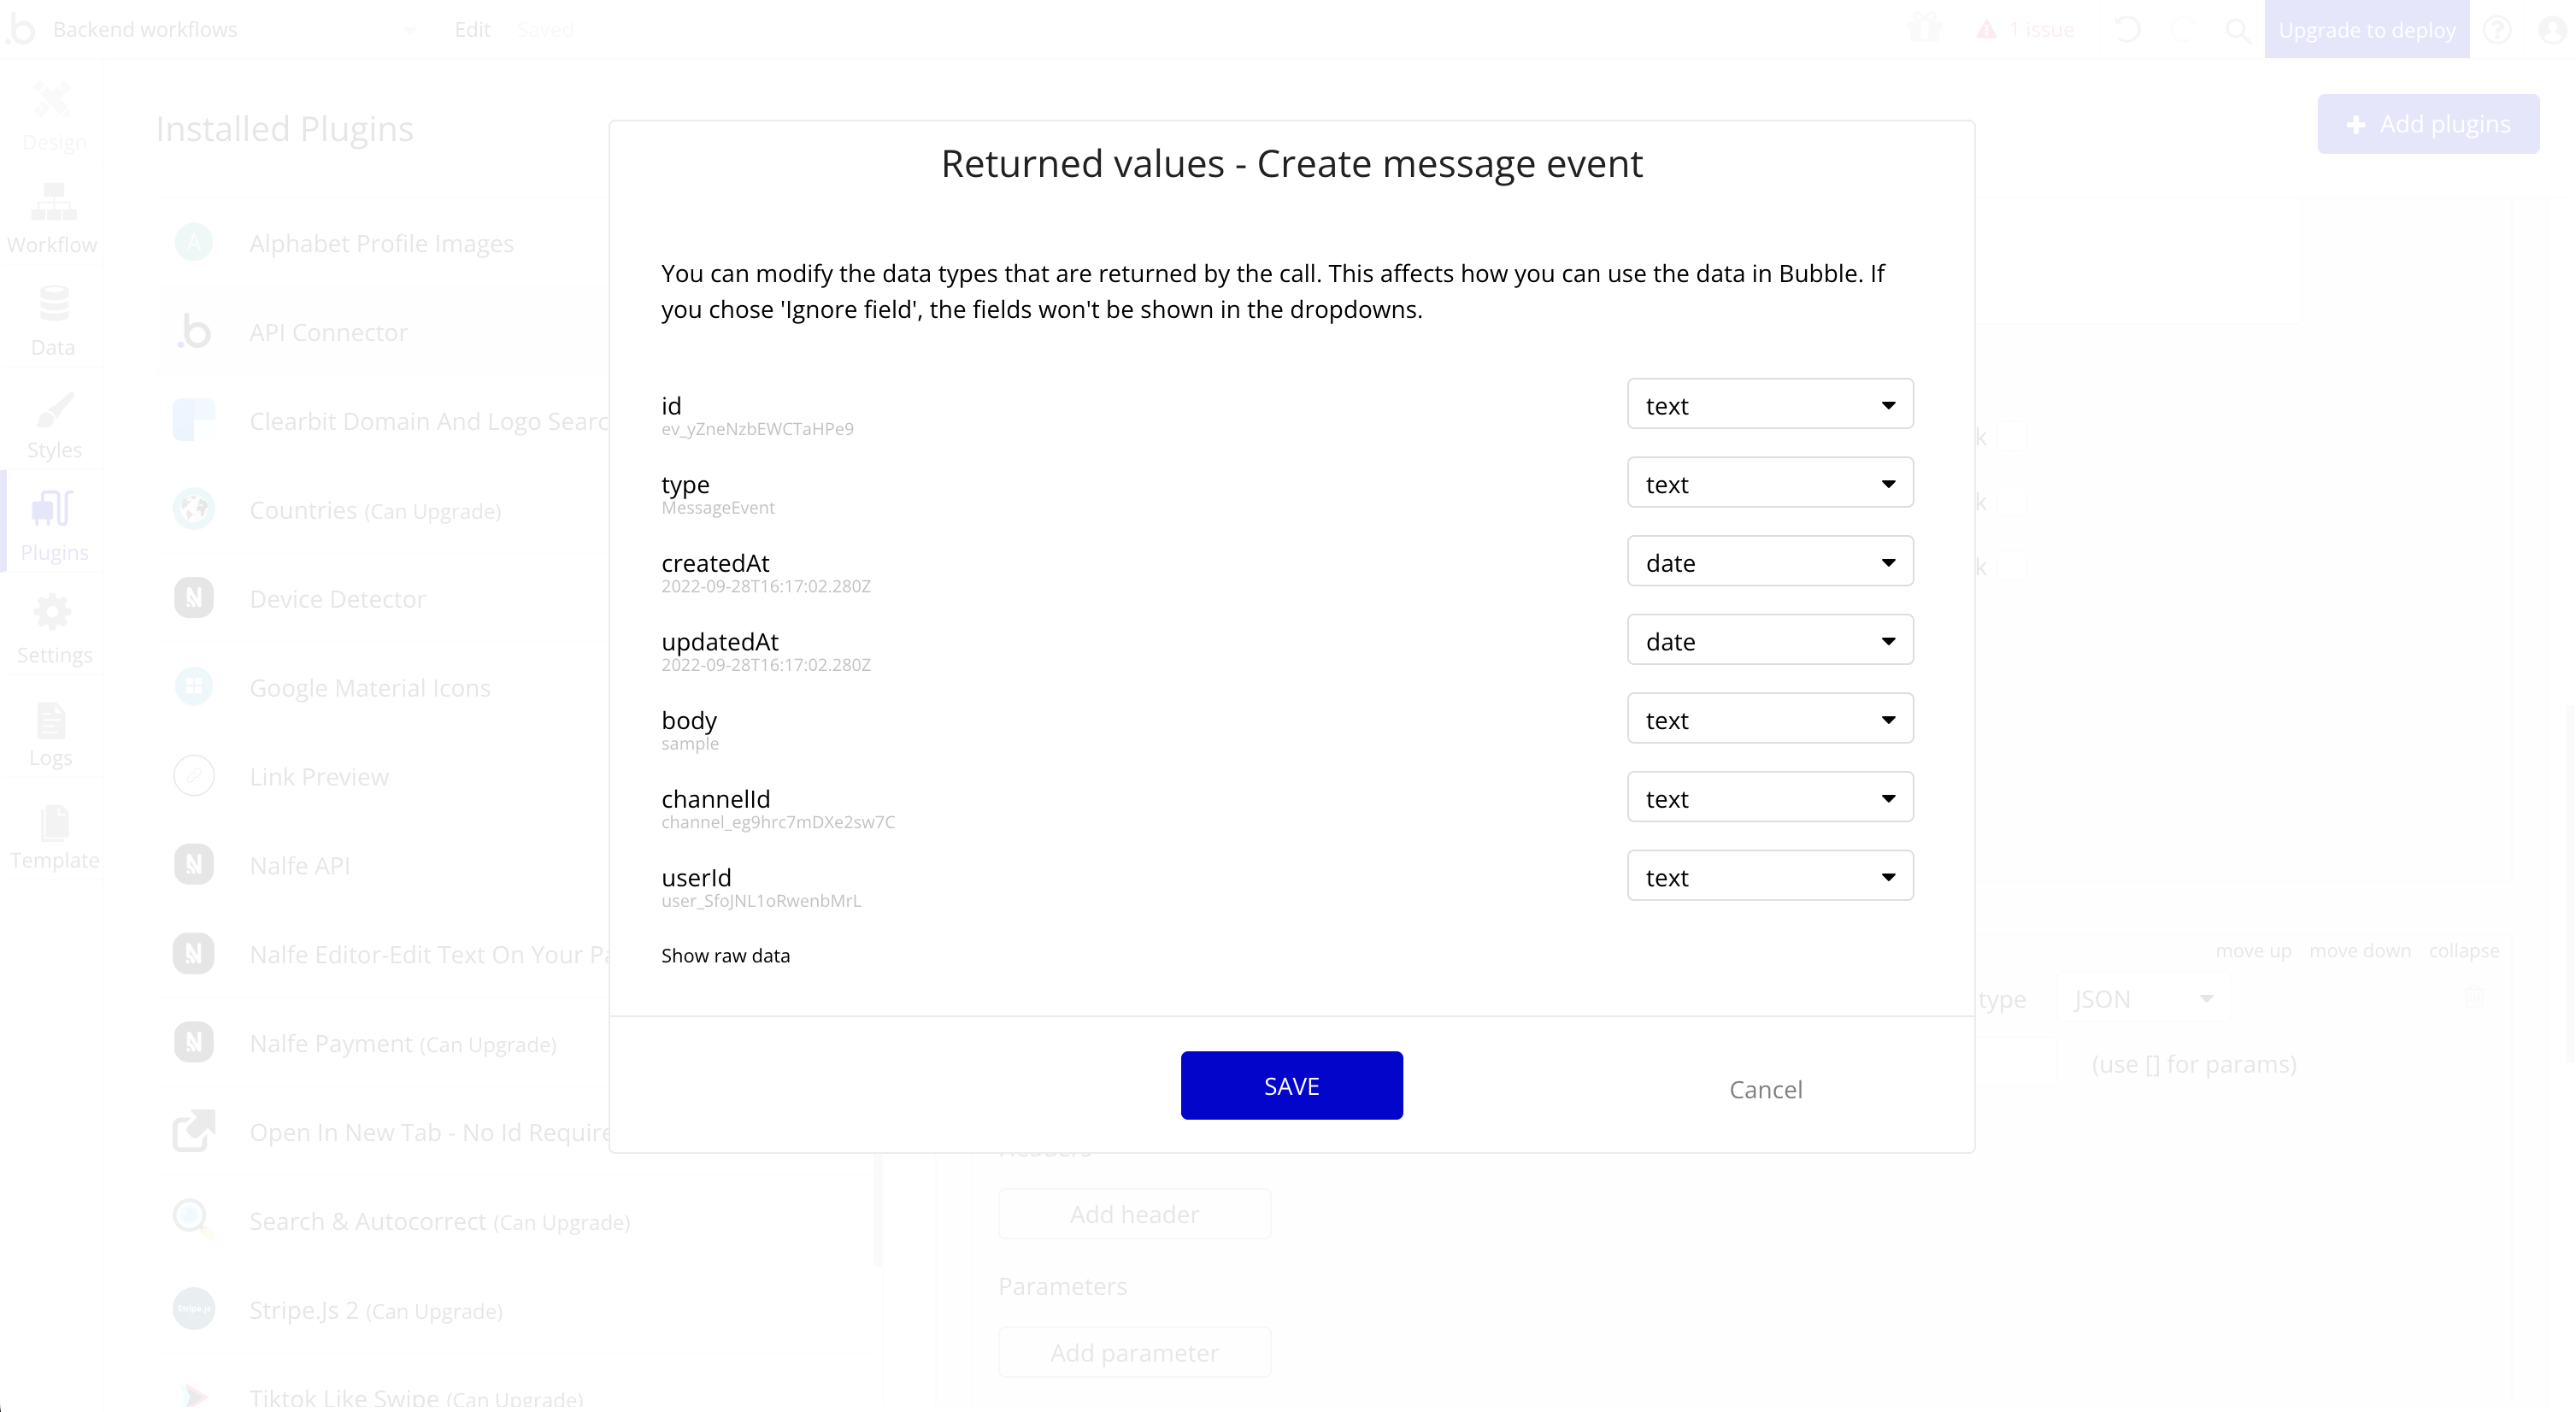
Click 'Initialize call' to test the connection. After successful connection, you'll be prompted to map data types.
Change the createdAt and updatedAt fields to 'date'.
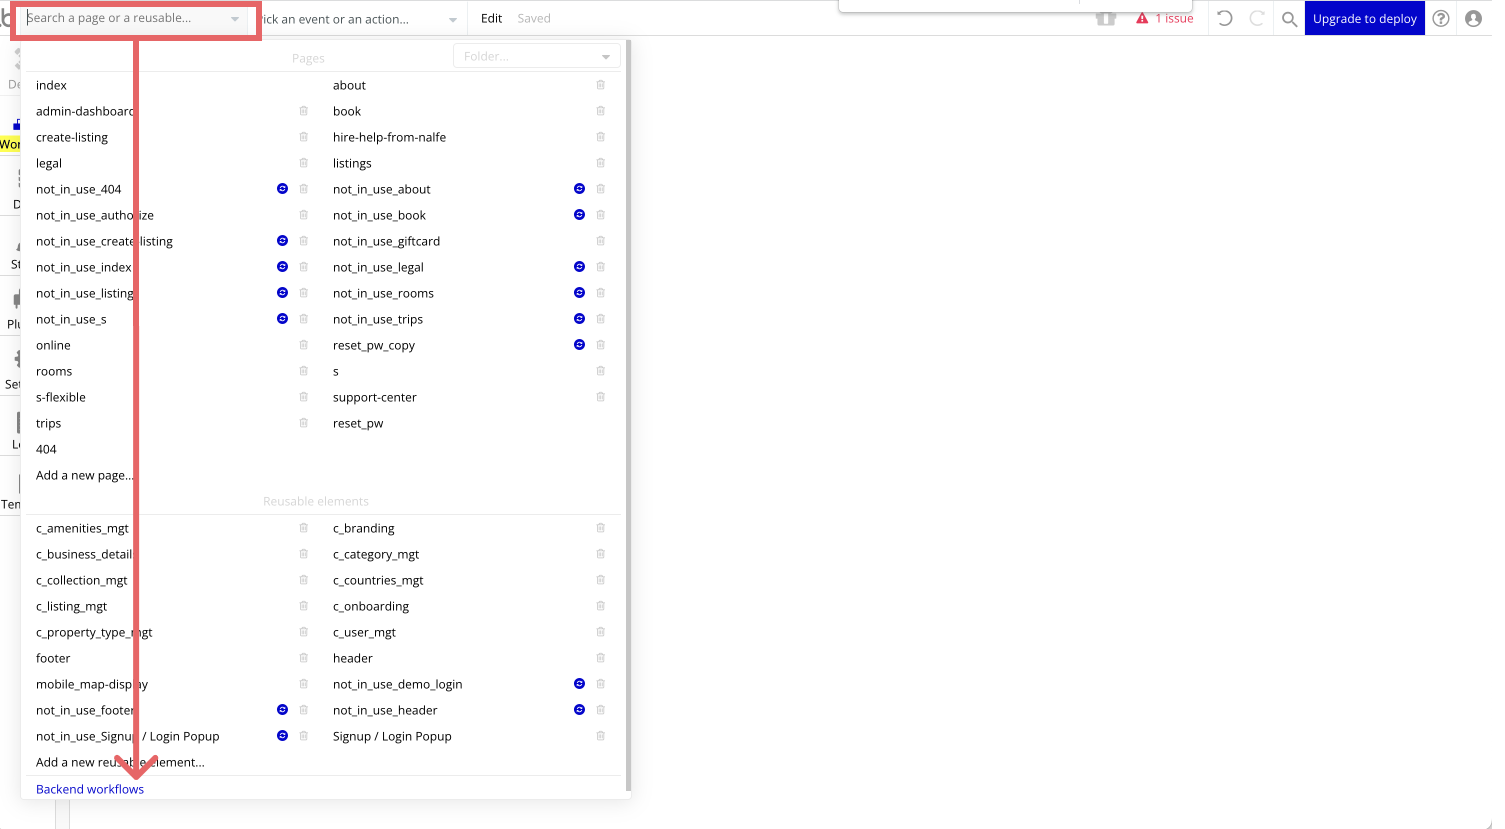
Now that you have your API connection to Marketbase configured, the next step is to setup the trigger on Bubble that will send data to Marketbase each time it's called.
Within your Bubble application's editor, click on the page dropdown and click 'Backend workflows'.
Click on 'Click here to add a backend workflow...'
From the dropdown, go to 'General' > 'New database trigger event...'.
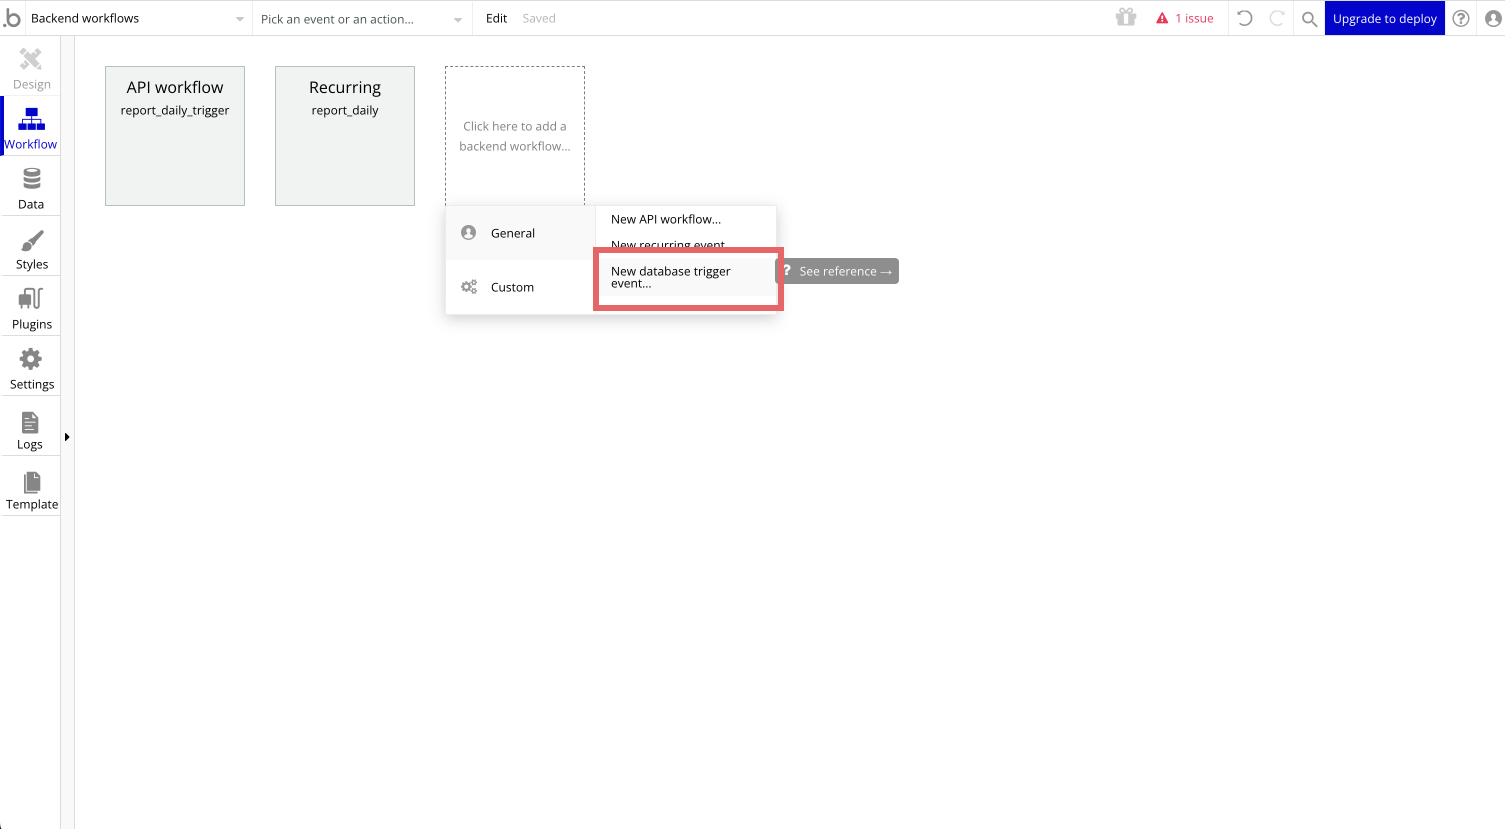
Input the following to create the database trigger event which will be called every time a new message is created on Bubble:

Setup an action on the database trigger event. Click on 'Click here to add an action...'
From the dropdown, click on 'Plugins' > 'Marketbase API - Create message event'.
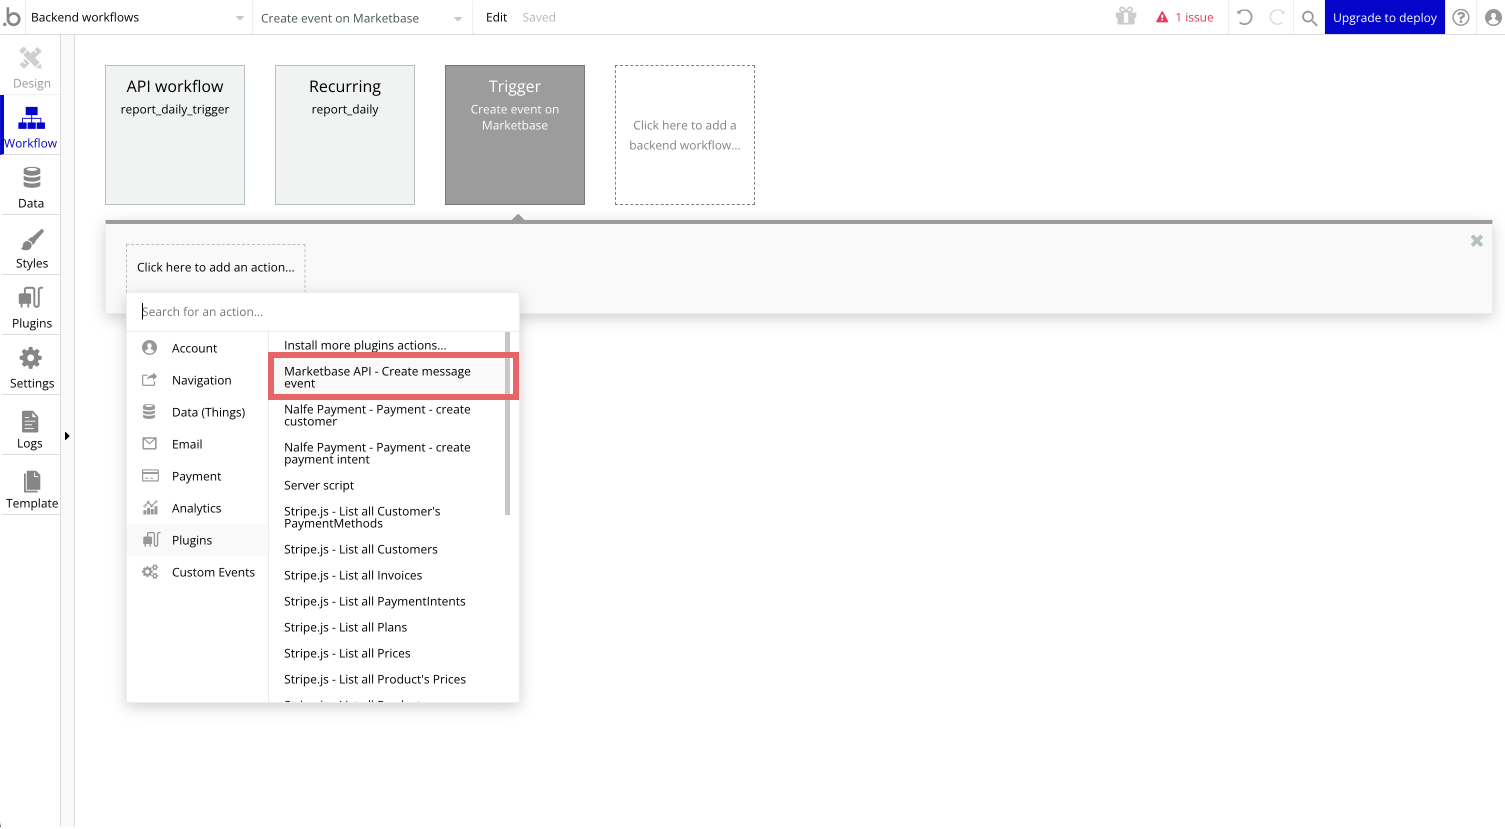
This will add an action with the default values ('sample') for each field that was set in Step 4.
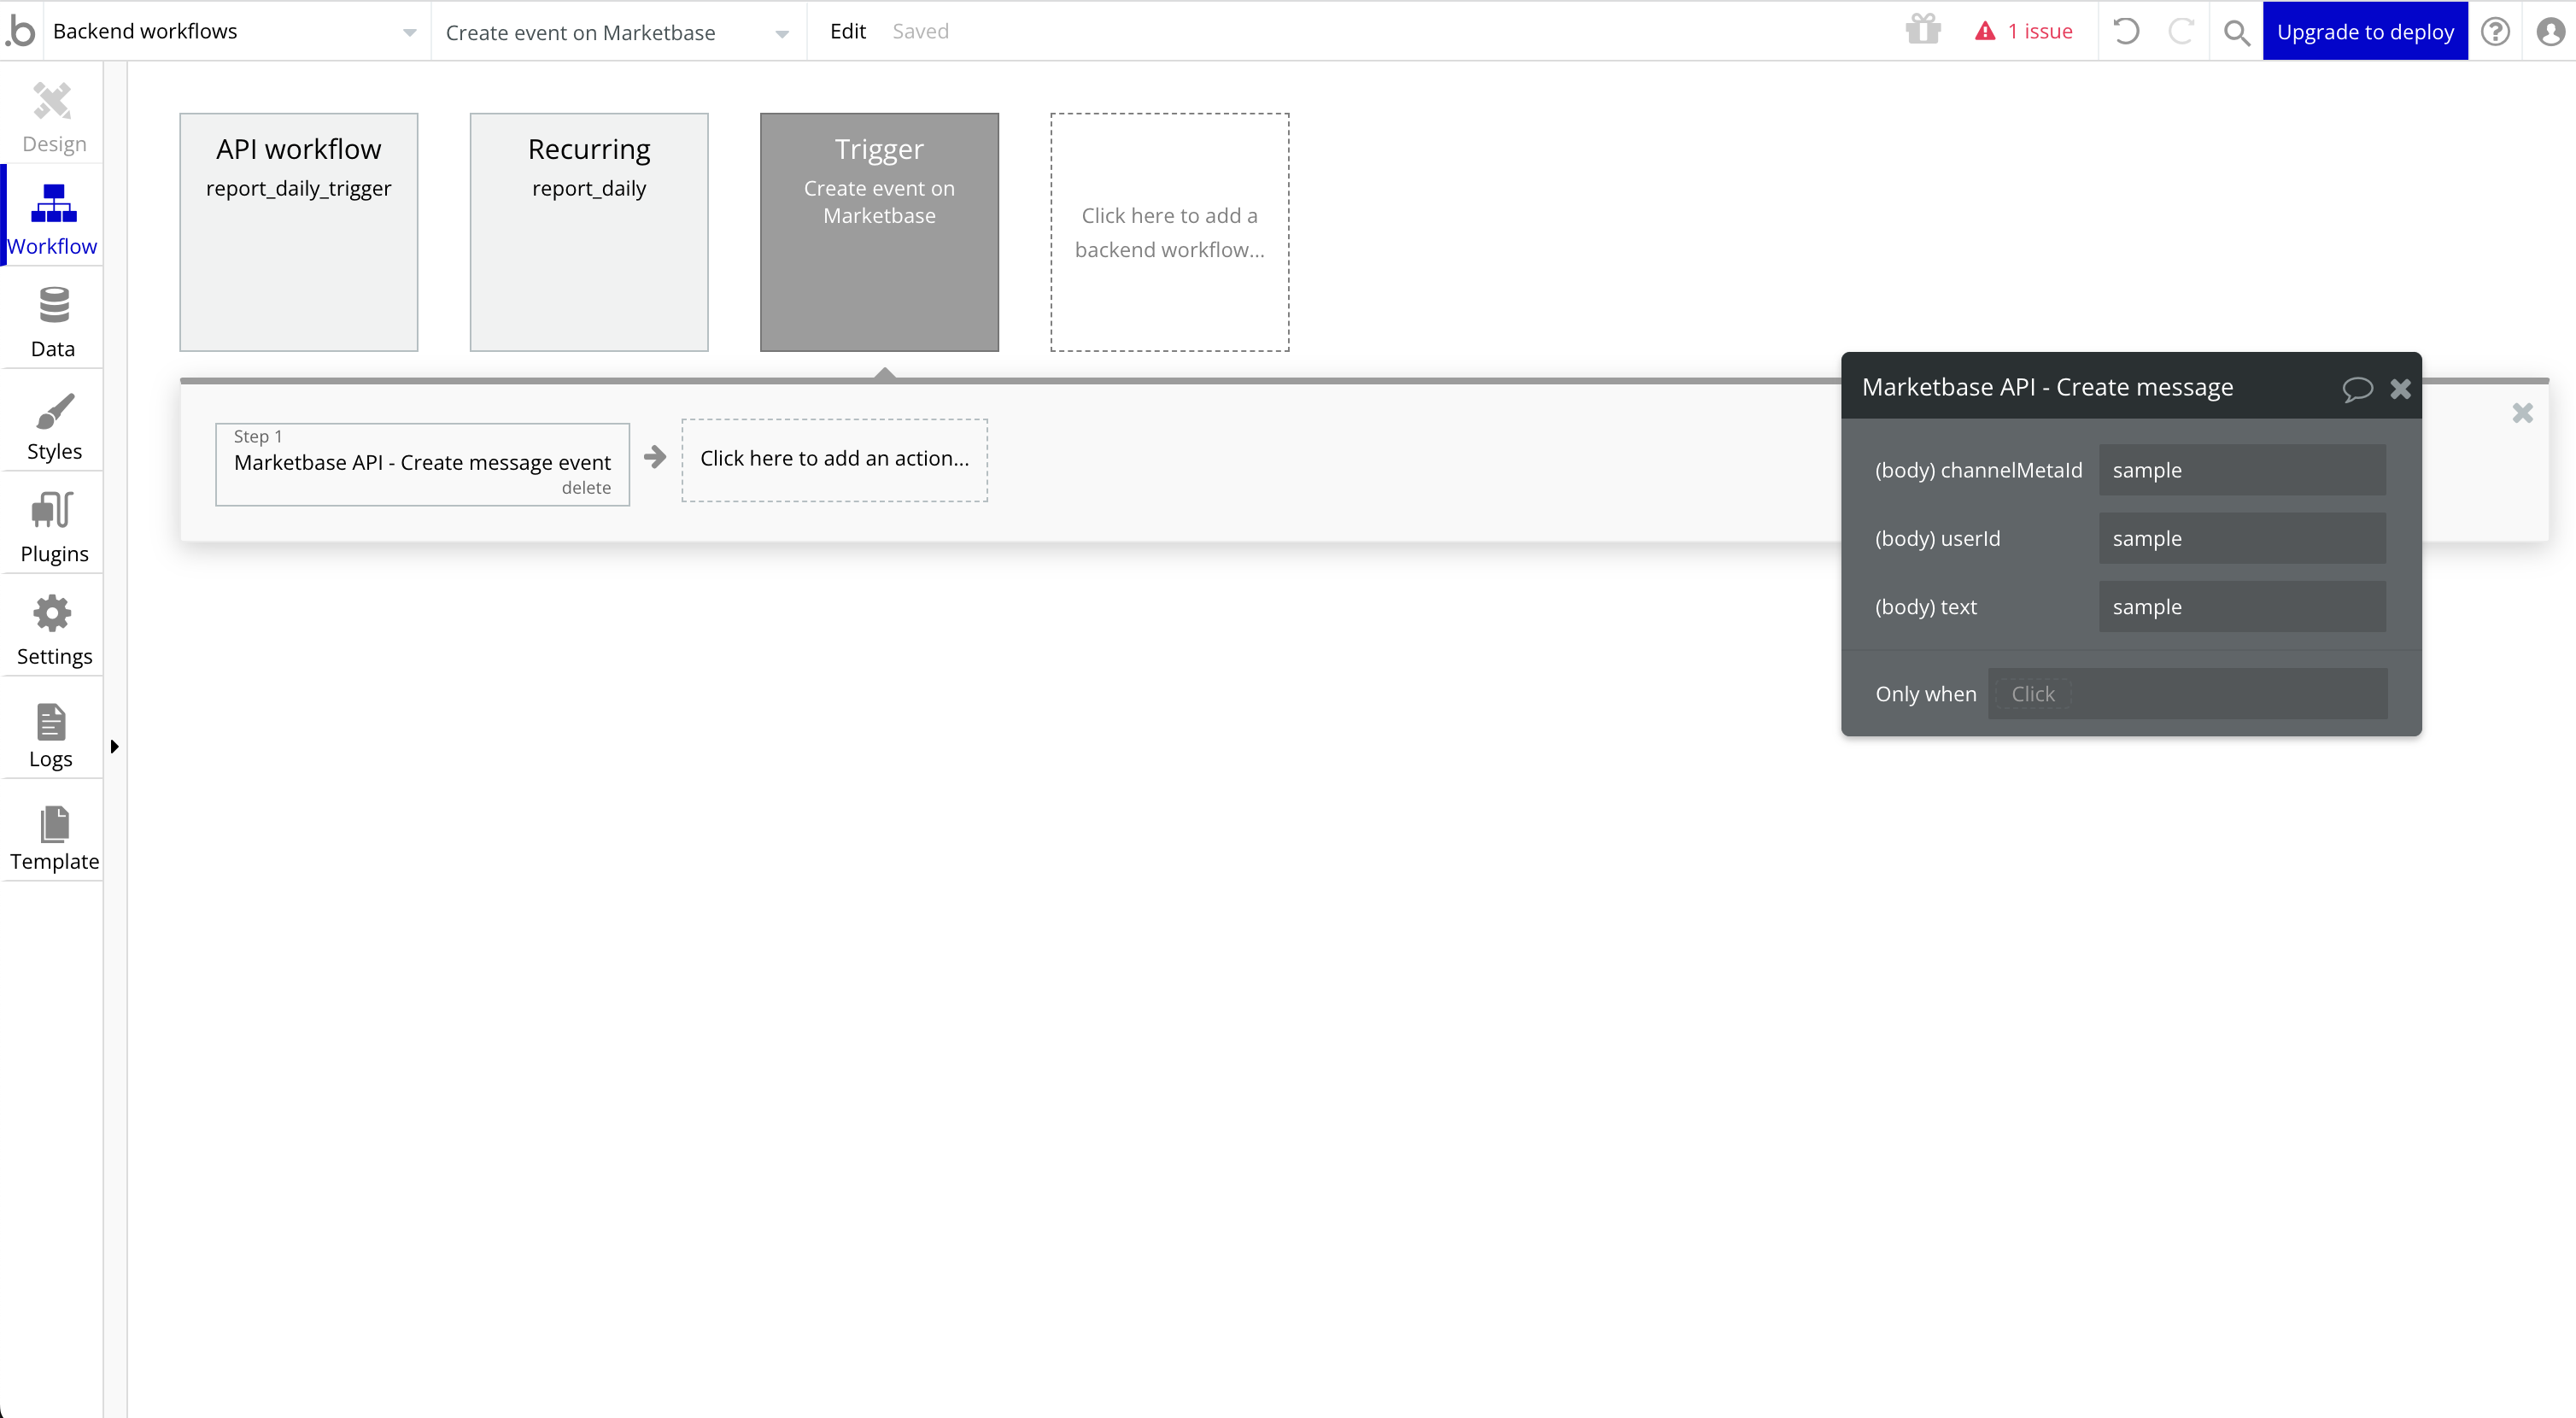
Click on a 'sample' field input and then click on 'insert dynamic data' button to map each field to dynamic data. These may vary depending on your data types within your application.

Your backend workflow is now configured and connected to Marketbase through the API Connector plugin. Let's test the workflow by adding sample data through the Bubble dashboard.
Within your Bubble application's editor, click on the 'Data tab'.
Click on 'App data' tab.
Click on your conversation messages view. eg. 'All Conversation_messages'
Click on 'New entry'.
Fill in test data.
Click create.
Example of how your messages app data might look like:
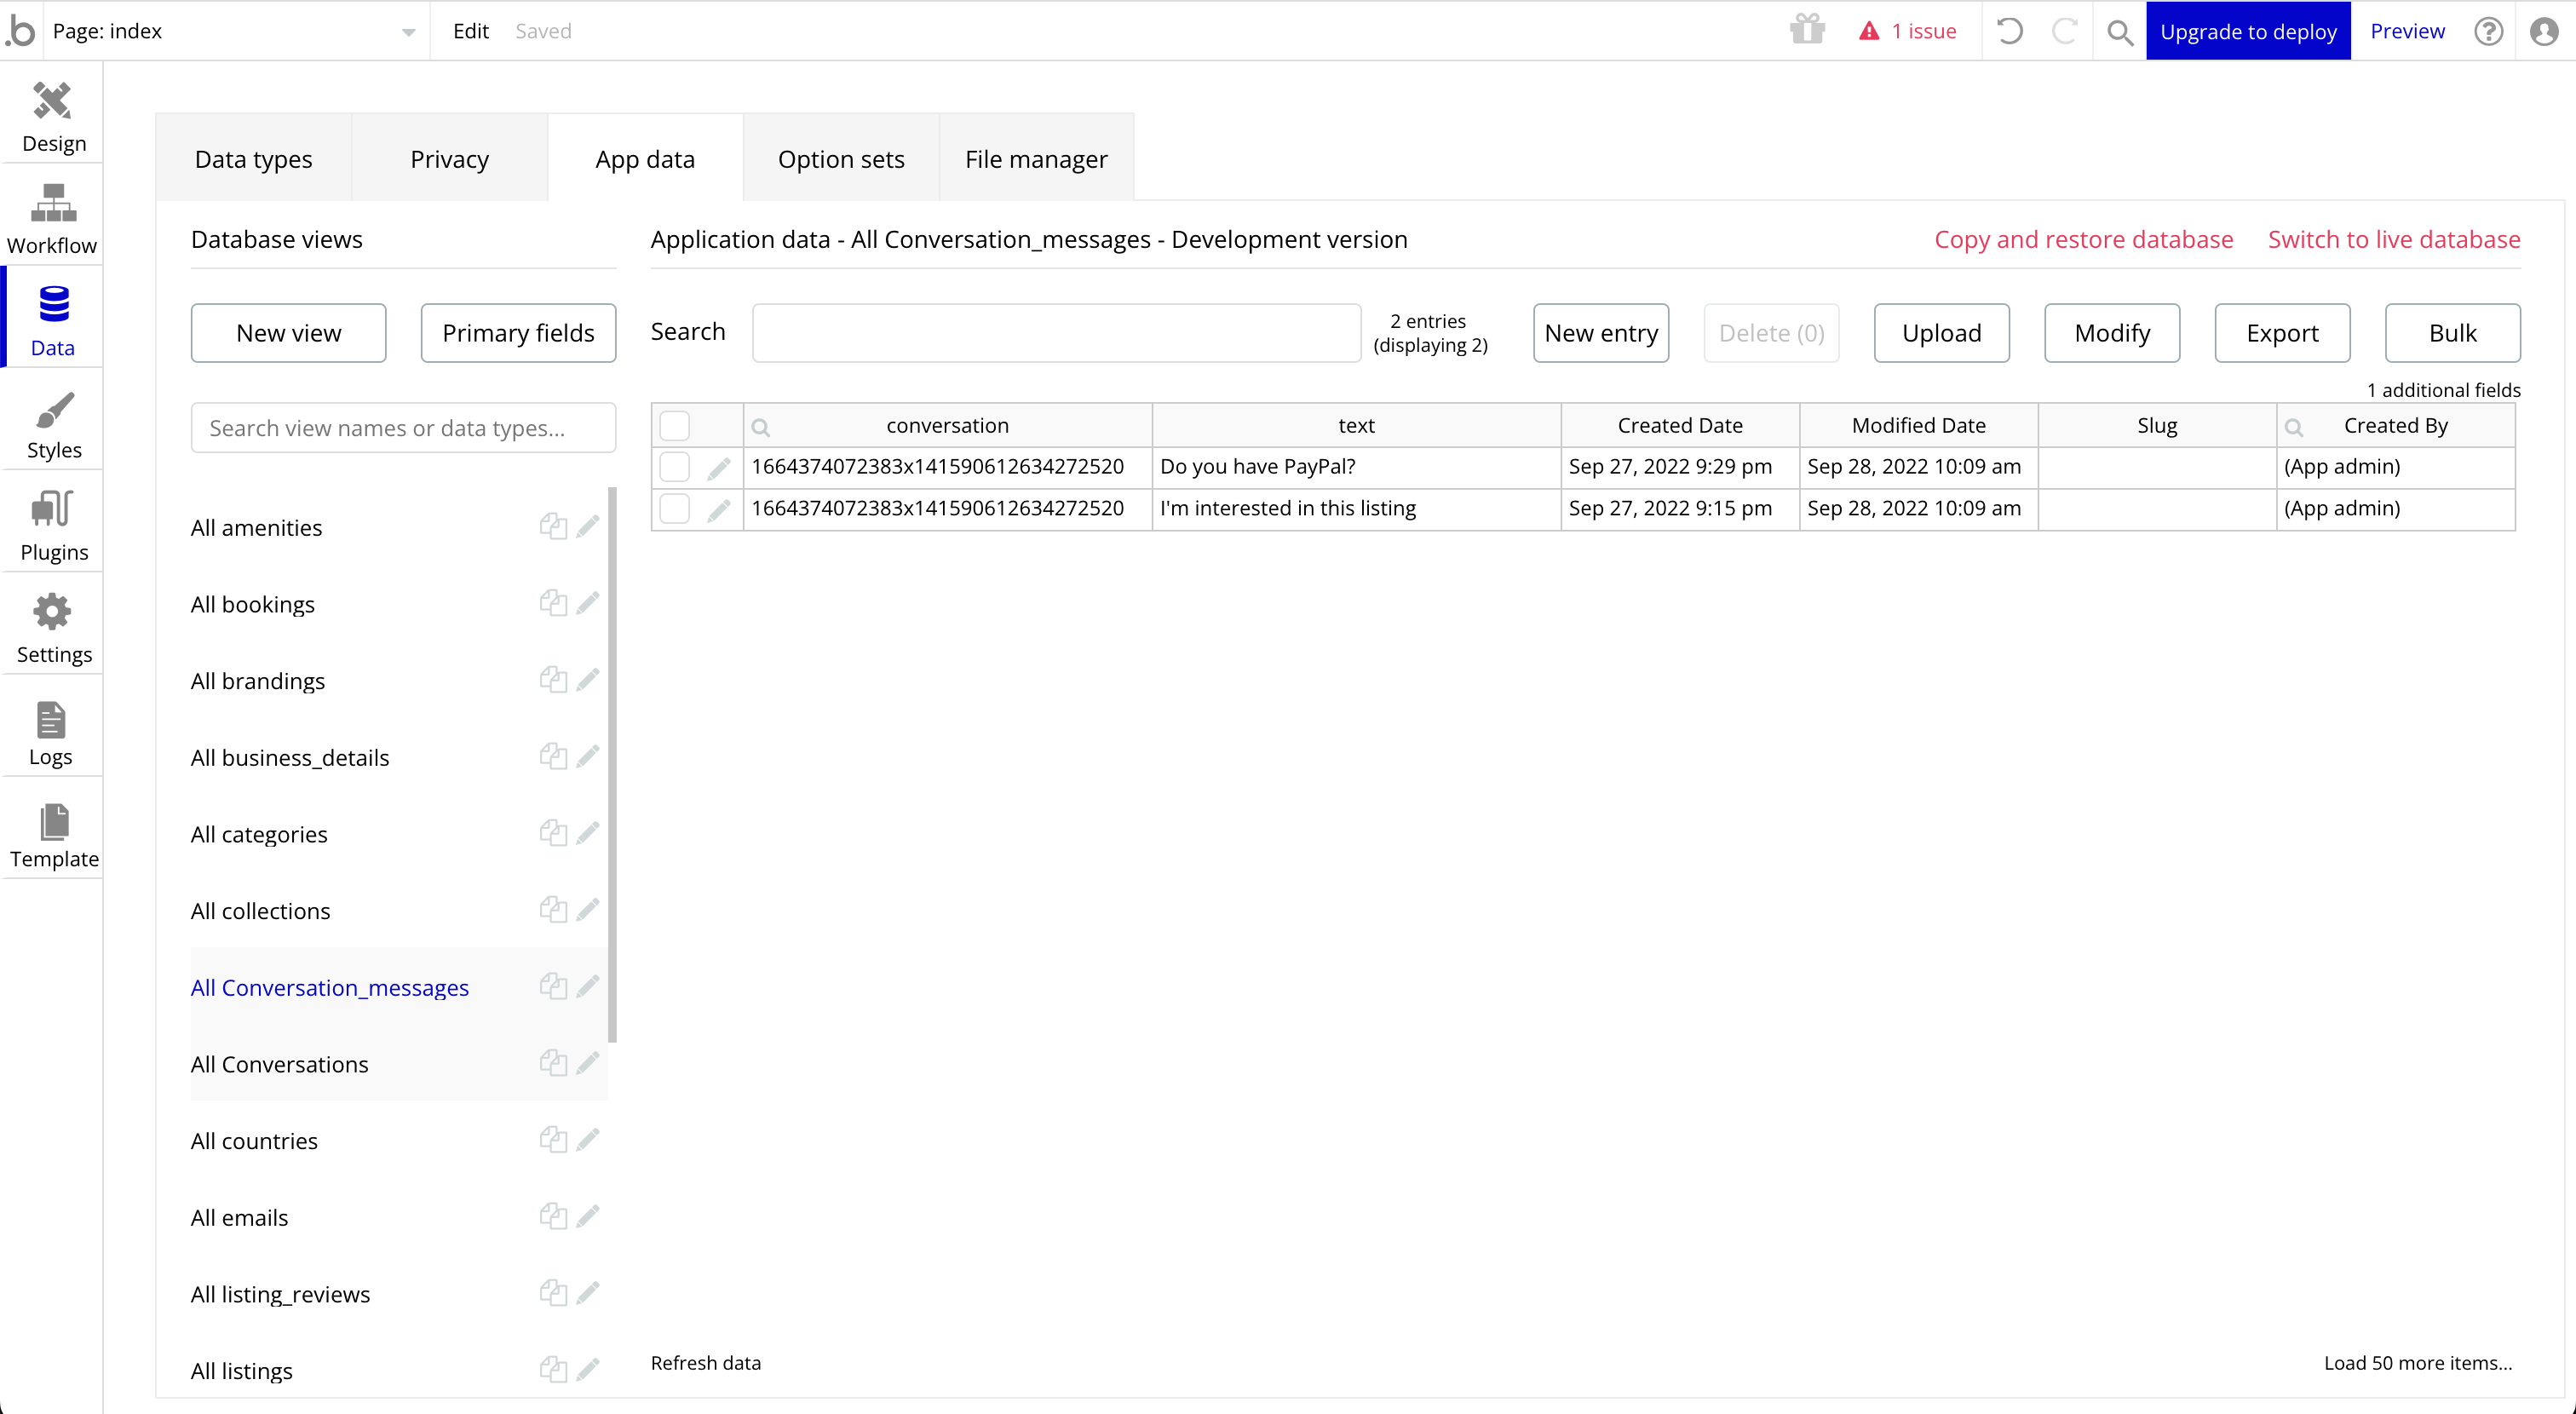
Each of these sample messages should go through the backend workflow that we created in Step 5. Confirm that these and new messages are being populated on the workspace within your Marketbase dashboard.
If you are running into any problems, feel free to email us at support@marketbase.app for help.